Easy Cable Headband Crochet Pattern: Beginner Friendly
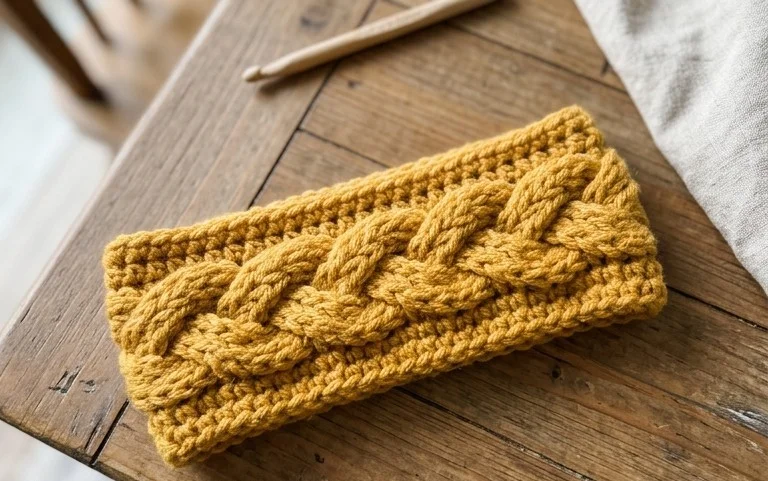
This headband features a squishy, braided texture that keeps ears warm during cold walks without needing a bulky hat. You will find that the soft fabric has a nice weight, making it a great project for those who want to practice cable stitches without feeling overwhelmed. Beginners often find this pattern rewarding because the cable effect relies on simple front-post stitches rather than complicated geometry. It is a fantastic option for quick gift-making when you only have a few hours to spare. By learning how to twist these stitches across a simple rectangle, you gain a versatile skill that you can apply to scarves and blankets later. The final piece stays snug against the head, providing both style and function during winter weather.
Why You’ll Love This Pattern
This crochet ribbed beanie pattern utilizes a simple back-loop-only technique that creates a professional, store-bought look with minimal effort. You work the hat as a flat rectangle, which removes the need for complex shaping or internal round counting during the main body construction. The resulting fabric is stretchy, dense, and warm, making it an ideal choice for winter headwear. Because the design relies on a basic half-double crochet stitch, it works up quickly in an evening, allowing you to produce high-quality gifts in short order.
I finished this hat in one sitting while watching a movie. The instructions were easy to follow and the ribbing looks very professional once the seam is closed.
— Sarah, hobbyist maker
Pattern Overview & Skill Level
- Skill Level: Beginner
- Approximate Time: 2 to 3 hours
- Construction: Flat rectangle worked in rows, seamed to form a tube, and gathered at the top
- Finished Dimensions: Fits an average adult head (20-22 inches circumference); height is adjustable
Materials & Supplies Needed
- Yarn: Worsted weight (#4), wool or acrylic blend, approximately 200 yards.
- Hook Size: 5.5 mm (US I-9).
- Notions: Tapestry needle for seaming and weaving ends, large pom-pom maker (optional), stitch markers.
- Safe Yarn Substitutions: Cotton yarn will result in a heavier, less stretchy hat. If using a lighter DK yarn, increase your starting chain length by 10% to maintain the same finished circumference.
Stitch Guide & Abbreviations (US Terms)
- ch = chain
- hdc = half double crochet
- st/sts = stitch/stitches
- BLO = back loop only (inserting the hook only through the rear loop of the stitch to create a ribbed texture)
- sl st = slip stitch
- FO = fasten off
Step-by-Step Pattern Instructions
Hat Body
- Row 1: Ch 41. Hdc in the second ch from hook and each ch across. Ch 1, turn. (40 sts)
- Row 2: Hdc in BLO of each st across. Ch 1, turn. (40 sts)
- Row 3-60: Repeat Row 2 until the piece measures approximately 20 inches when slightly stretched. Do not FO.
Assembly
- Fold the rectangle in half so the short ends meet.
- Working through both layers, sl st across the short edges to join the tube.
- FO, leaving a long tail of approximately 12 inches.
- Thread the tail onto a tapestry needle. Weave the yarn in and out of the edge of one side of the tube.
- Pull the tail tight to close the top of the hat securely. Knot the yarn firmly on the inside and weave in the remaining end.
Care & Washing Instructions
- Hand wash in cool water using a mild wool-safe detergent to preserve the shape and fiber integrity.
- Lay the hat flat on a dry towel and reshape it to its original dimensions before allowing it to air dry.
- Avoid using a tumble dryer, as heat can shrink natural fibers and cause synthetic yarn to lose its elasticity.
Pro Tips & Common Mistakes to Avoid
Maintain consistent tension throughout the rows to ensure the ribbing looks uniform. If your tension is too tight, the hat will not have the necessary stretch to fit comfortably over a head. Always count your stitches at the end of every row; missing a stitch will result in a slanted edge that makes seaming difficult. Use a stitch marker on the first stitch of each row to help track your progress until you are comfortable identifying the end of the row. If you wish to adjust the size, add or subtract foundation chains; adding chains makes the hat longer (taller), while adding rows makes the hat wider (larger circumference).
Frequently Asked Questions
Can I use a different yarn weight for this pattern?
Yes, but you will need to adjust your stitch count. A thinner yarn requires more stitches per row to reach the same height, while a thicker yarn requires fewer stitches.
Is this project suitable for complete beginners?
Yes. This pattern only requires knowledge of the half double crochet stitch and the ability to work in the back loop, which is a foundational technique.
How do I make the hat slouchy?
To create a slouchier fit, simply add more foundation chains at the start of Row 1. This increases the total height of the hat so it extends further past the crown.
Am I allowed to sell hats made from this pattern?
You are welcome to sell finished items made from this pattern. Please credit the design to this tutorial when selling your work online.
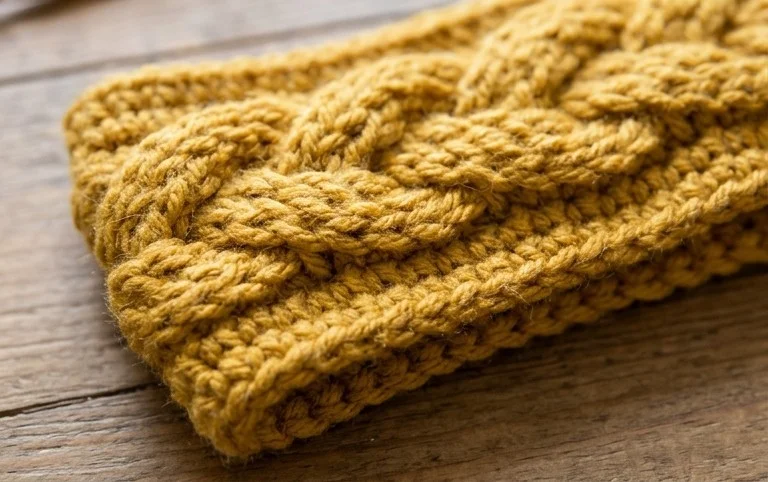
Your finished headband provides a cozy layer of warmth that fits comfortably under any winter coat hood. Try swapping the worsted wool for a soft alpaca blend if you prefer a fuzzy, lightweight feel against your skin. You can also experiment with a variegated yarn to highlight the cable twists with shifting colors. Please share a photo of your work on your favorite social media site so other makers can see your progress. Feel free to browse through the rest of the blog for more free patterns to fill your afternoon.