Easy Ribbed Crochet Beanie Pattern: Free Step-by-Step
Soft wool against your skin makes this simple hat a go-to item for chilly mornings or breezy coastal walks. You will love how the structured fabric holds its shape while offering a cozy, bounce-back feel that stays put on your head all day. This project is a gentle introduction to working with flat panels, teaching you how to build height and width through basic stitches rather than complex shaping. Even if you have only ever crocheted a basic washcloth, you can complete this accessory in an afternoon. Creating a handmade gift for friends or family feels rewarding when the stitch pattern is this rhythmically meditative and satisfying to complete from start to finish.
Why You’ll Love This Pattern
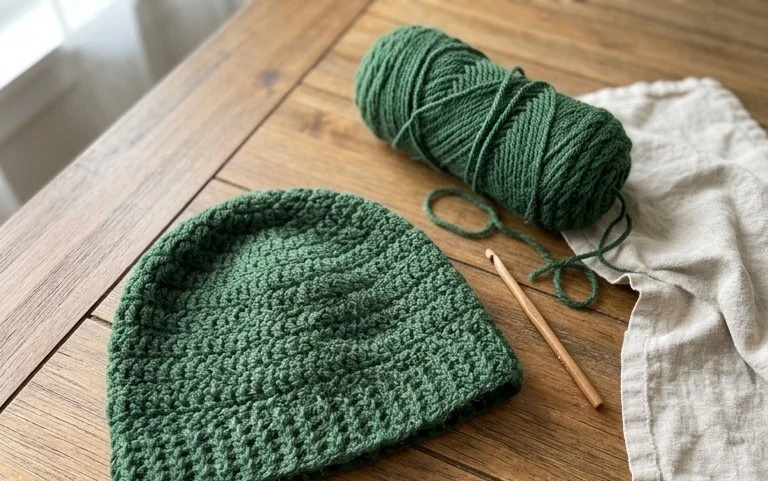
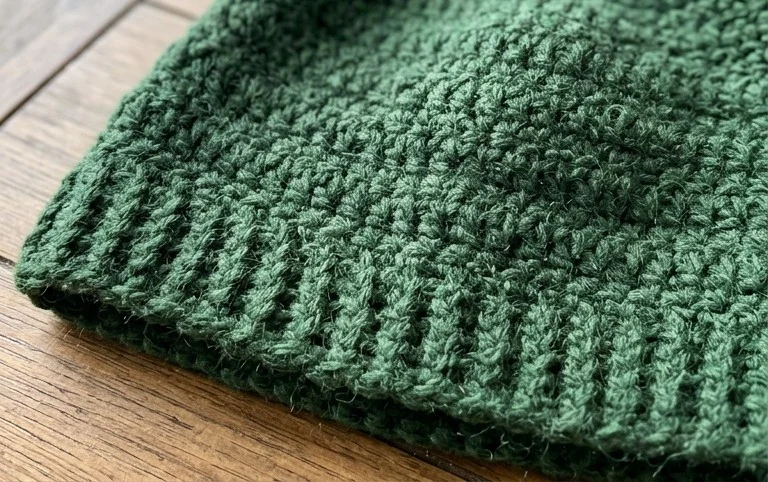
This crochet ribbed beanie offers a classic, fitted silhouette that sits comfortably against the head without feeling bulky. The design relies on the slip stitch ribbing technique, which mimics the look of store-bought knit hats while providing significantly more stretch and thermal retention. Because it is worked as a flat rectangle and then seamed, you can easily adjust the height of the brim or the slouchiness of the crown to suit your personal style. The project uses a simple, meditative repeat that makes it an ideal choice for crocheting while traveling or watching television.
I finished this hat in one sitting because the stitch rhythm is so consistent and satisfying. It fits perfectly and the ribbing stays snug through a full day of wear.
— Sarah, intermediate crocheter
Pattern Overview & Skill Level
- Skill Level: Beginner
- Approximate Time: 3 to 5 hours
- Construction: Worked flat in rows to create a rectangular panel, then seamed along the side and gathered at the top.
- Finished Dimensions & Sizing: Adult medium, approximately 18 inches in circumference (stretches to 22 inches) and 9 inches in height.
Materials & Supplies Needed
- Yarn: Worsted weight (#4), wool or acrylic blend, approximately 200 yards.
- Hook Size: 5.0 mm (US H-8) crochet hook.
- Notions: Tapestry needle for seaming, stitch markers, and a pair of sharp scissors.
- Safe yarn substitutions: You can use a cotton blend for warmer climates, though it will have less natural elasticity than wool. If you choose a lighter weight yarn, you will need to increase the starting chain length and work more rows to achieve the same finished dimensions.
Stitch Guide & Abbreviations (US Terms)
- ch = chain
- st = stitch
- sl st = slip stitch. Insert hook into the back loop of the stitch, yarn over, and pull through both the stitch and the loop on your hook.
- BLO = back loop only. Work your stitches into the loop furthest away from you to create the ribbed texture.
Step-by-Step Pattern Instructions
The foundation of this hat is a series of rows that create a textured fabric. Ensure you keep your slip stitch tension loose enough to easily insert the hook on the return row.
Hat Body
- Row 1: Ch 46. Sl st into the second ch from the hook and in each ch across. Turn. (45 sts)
- Row 2: Ch 1 (does not count as a stitch). Working in BLO, sl st in each st across. Turn. (45 sts)
- Rows 3-70: Repeat Row 2 until the piece measures approximately 18 inches unstretched.
- Finishing: Fasten off, leaving a 12-inch tail of yarn for seaming.
Assembly
Fold the rectangle in half, matching the short ends together. Use your tapestry needle and the long yarn tail to sew the two edges together using a whip stitch or mattress stitch. Once the seam is secure, weave your yarn through the stitches along the top edge of the tube. Pull the yarn tight to gather the top of the hat closed, securing it with a few firm stitches before weaving in your ends.
Care & Washing Instructions
- Hand wash in cool water with a gentle wool-safe detergent.
- Lay the hat flat on a towel to air dry, away from direct heat sources.
- Reshape the hat while damp if the ribbing appears uneven from the weight of the water.
Pro Tips & Common Mistakes to Avoid
Maintain consistent tension throughout the project by keeping your yarn tail loose; if your slip stitches are too tight, the hat will be difficult to work into and will lose its elasticity. Use a stitch marker on the first stitch of every row to ensure you do not accidentally skip the final stitch, which causes the edges to slant. When weaving in your ends, run the needle through the center of the ribbed columns to keep the stitches invisible on the exterior. If you wish to make the hat larger or smaller, simply add or subtract rows in increments of two, remembering that each row adds approximately 0.25 inches to the circumference.
Frequently Asked Questions
Can I use a bulky weight yarn instead?
Yes, but you will need to adjust the hook size to match the yarn manufacturer’s recommendation. Using bulky yarn will result in a thicker, warmer hat, but you should decrease the number of starting chains to maintain the intended height.
Is it possible to sell items made from this pattern?
You are welcome to sell finished hats made from this pattern. I ask that you provide credit to the designer and use your own original photographs for your listings.
Why are my edges looking uneven?
Uneven edges are usually the result of missing the last slip stitch of the row. Always count your 45 stitches at the end of every row before turning your work.
How do I make the hat slouchier?
To create a slouchy fit, increase the starting chain count by 10 to 15 stitches. This will add extra length to the body of the hat, allowing it to hang further down the back of the head.
Watching your stitches grow into a finished accessory provides such a sense of accomplishment during a quiet weekend at home. You could easily swap the wool for a soft bamboo blend to create a lighter version that works well for transition seasons or cooler spring evenings. If you share a photo of your finished work on Instagram or Pinterest, others will appreciate seeing how your color choices turn out. Feel free to browse our collection of free patterns for more ways to fill your project bag with functional, handmade items.